CCExtractor regresssion testing / GitHub bot
In 2014 Willem wrote a nice tool that allows you to compare CCExtractor's output between versions to make sure code changes didn't break things. This tool has been expanded in t he past two years to cover more scenario's, as well as offering better integration.
All changes must be validated using this tool. As of 2016, it is fully integrated (using a webhook) with GitHub, so if you make a Pull Request, you should be able to see if you broke anything or not.
Pull Requests that break things severely won't be accepted (due to the way the test suite compares the results, minor changes in timing are also indicated as failures, while they don't necessarily have to be).
GitHub integration
As mentioned above, as part of GSoC 2016 a full integration was made with GitHub. This means that just as with other integrations, the regression test suite will now run automatically when you create a Pull Request or if you make a commit on the repository.
When creating a pull request (PR), the next steps happen:
- Test get queued (another one might be running that needs to finish first)
- The platform kicks off the test suite:
- Your code gets locally merged with the current master branch
- The result is compiled
- The test suite runs the tests on the compiled binary
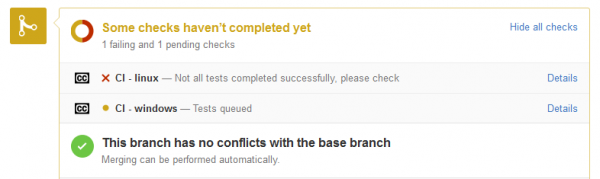
Several individual steps (preparation, building, compiling, ...) are being reported back to the PR on GitHub, while the detailed overview is available by clicking on the "details" (as can be seen in the image below):
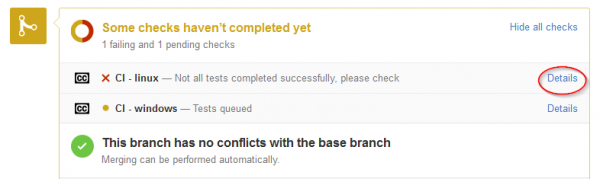
This link will take you to the detail page of the test, where you can check the status of the test in general, as well as the results for each category.
How to run your own tests on fork
If you want to run your own tests on your fork commit with selected regression tests and platforms, Follow these steps:
- Ask for tester/contributor role from Willem. You can see your role here.
- After role access, link your github profile in Manage account page.
- You can run your own tests here. You have to enter commit hash of the fork repository.After that you need to select platforms and regression tests. Test Status is displayed on same page.
Obtaining individual regression samples
If you are aware your coding changes are going to break a specific sample, you can always download the sample from the platform to test your code changes locally. This has the advantage that you can test faster, as the complete test suite takes about 30-60 minutes to complete.
Media-info for the samples is also available (both partially visible on the sample detail page, as fully visible after downloading).
How to use the testing tool manually
If you have access to the dev server at gsocdev3.ccextractor.org, or have downloaded all the samples, you can run the test tool manually. This has the benefit that you can test just single categories, or specific samples only, whereas the GitHub integration does all the available tests.
The easiest way to test all the current samples against your own version
of CCExtractor is using a shell script that does most of the work for
you: /repository/newRepository/TestSuite/runAllTests CCExtractorLocation ReportLocation
The CCExtractorLocation is the location of your CCExtractor build that you want to test (against the latest official CCX version). The ReportLocation is optional (if omitted, the reports will be stored under your name in a subfolder of Willem's public_html folder).
If you want to have more configuration options, you can create your own
config or test files (there is a sample config at
/repository/newRepository/TestSuite/sampleconfig.xml and for a sample
test file you can look in the folders), and then call the
ccextractortester bash script (located at
/repository/newRepository/TestSuite/ccextractortester) with the
appropriate parameters.
If you want to know the available parameters that can be passed to the test suite, use the --help argument.
Bugs, requests, etc. are welcome on the GitHub page of the test suite: https://github.com/canihavesomecoffee/ccx_testsuite